
How to Make Goat Milk Soap
Read all the way to the bottom before you start.
Don't have a kit yet? Get one from our Etsy shop.
What’s in the box
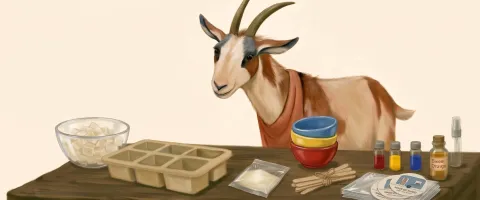
- Soap base
- Goat milk powder
- Red, yellow and blue colorant
- Fragrance vial (scented kits)
- Stir sticks
- Mold tray for six bars
- Spray bottle for alcohol
- Clear bags
- “Made by” labels
What you will need
- A microwave-safe measuring cup with a pour spout, 24 ounces or larger, or a saucepan with a pour spout on a stovetop
- Small cups or bowls for the milk paste and for mixing colors
- A spoon for mixing in the milk and the colors
- Rubbing alcohol, 70% is fine, to pop any bubbles
- A cookie sheet or tray, in case you need to move your bars before they set
- Markers to write your name on the labels
- An adult assistant to help carry, stir and pour the melted soap base while it is hot
- At least twenty minutes of creative fun, then one to two hours of waiting for your soap to set up
Making the soap
-
Set up
Place the mold tray on a cookie sheet or tray where it will not need to be moved. Lay out your cups or bowls, spoon and stir sticks. Fill the spray bottle with isopropyl (rubbing) alcohol.
-
Melt the base
Image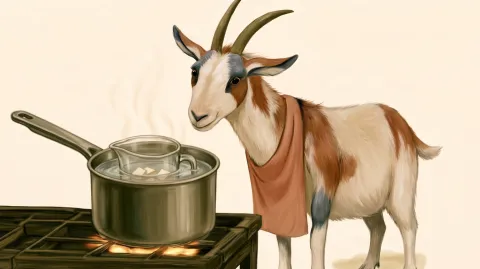
Microwave: put all the cubes in the measuring cup. Microwave for 30 seconds, stir, and repeat three or four times until the cubes are melted and clear.
Stovetop: Use a double boiler or stand the measuring cup in a saucepan holding an inch or two of water. Keep the water at a simmer and stir every few minutes until the cubes are melted and clear.
Do not overheat the base. Past about 160 degrees it turns cloudy and the milk can darken. Melted and clear is hot enough.
-
Make the milk paste
Image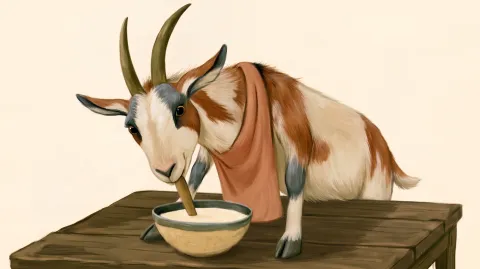
Spoon a little melted base into a small dry bowl. If the base is still quite hot, let it cool for a minute or two. Add the whole pouch of milk powder and mash it into a paste with your spoon. Mash out all the lumps until the mixture is smooth.
-
Add the milk paste to the soap base
Scrape all of the paste back into the measuring cup and stir gently until the base is an even cream color. Do not stir too hard. You want to avoid making bubbles.
-
Add the fragrance (skip if your kit came without fragrance)
Let the base cool for a minute first, because very hot soap loses its scent. Pour in the whole vial and stir gently. Leave the fragrance out if anyone using the soap has sensitive skin.
-
Color it
Image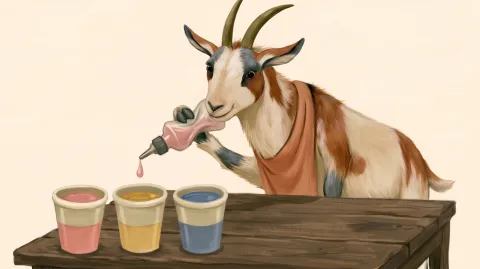
Pour the base into separate cups if you want more than one color. Shake each bottle first, then add a drop at a time and stir each one with a fresh stir stick. Three to ten drops per cup should do it.
-
Pour the soap mix into the molds
Image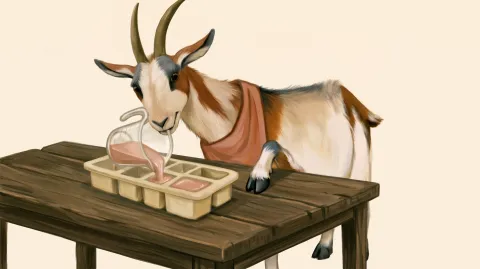
Fill each mold slowly, holding the cup close to the tray to avoid spills. This is another task you can give to an adult if they are standing by.
-
Spritz
Image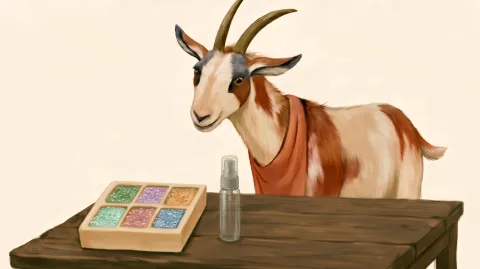
Mist the top of each bar with rubbing alcohol when bubbles appear, and watch them pop.
-
Wait
Let the bars rest one to two hours at room temperature until they are firm all the way through. A cool room sets the bars faster. A warm room takes longer, up to three hours. While you are waiting, write your name on the “made by” labels.
-
Take the bars out and bag them
Image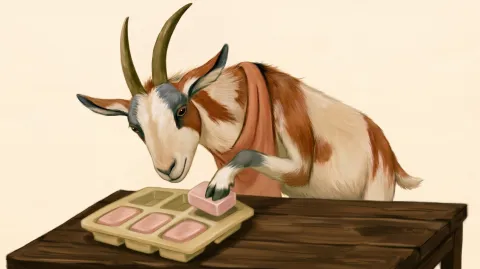
When the bars are solid, flex the tray and press each bar out from underneath. Once your bars are cooled, put them in the clear bags. Fold the top over to keep them fresh and seal them with the labels.
Your soap is ready to use, or to give to someone who will enjoy it.
Image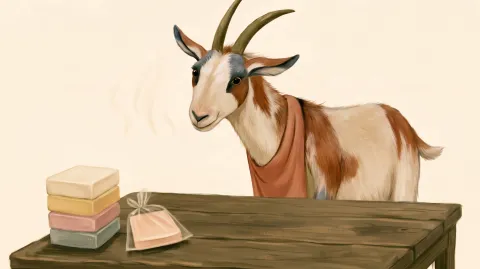
Want to try something fancier?
Swirls. Pour one color into the mold, then drizzle a second color on top. Drag a stir stick through it once or twice and stop. The more you drag, the more the two colors blend together into one.
Layers. Pour a shallow layer of one color. Wait until the top is firm when you touch it lightly, usually five to fifteen minutes in a cool room and longer in a warm one. Spritz it with alcohol, then pour the next color on top. The spritz is what makes the layers stick.
Tilted layers. The same as layers, but prop one end of the tray on a folded towel for the first pour so it sets at an angle. Set the tray flat again before you pour the next color.
Your leftover base will start to set while you wait. Stand the cup back in the hot water, or warm it up again for ten or fifteen seconds in the microwave.
If your kitchen is cool or warm
Melted soap base begins to firm up as soon as it leaves the heat, and the colorant thickens as it cools. Between about 68 and 75 degrees, everything behaves the way the steps above describe.
Read this if your kitchen is cooler than 68°F (20°C)
- Stand the three colorant bottles in a mug of warm water while you melt the base to warm them up. Keep them in the warm water until you're ready to use them.
- Open the milk pouch and set out every cup, spoon and stir stick before you melt the base. Once the base is liquid, you have only a few minutes.
- If melting on the stovetop, keep the melted base in the double boiler or measuring cup until you are ready to pour. If making more than one color, pour just enough for each color and do one color at a time.
- Remelting the base once or twice is fine if you need more time while mixing in the colors.
Read this if your kitchen is warmer than 75°F (24°C)
Working in a warmer room gives you more time with the melted soap when adding colors, but the layers take longer to firm up.
- Wait until the top of a layer holds a light touch before you pour the next one. This can take twenty minutes or more.
- Bars can take up to three hours to set. Put the tray in the refrigerator for twenty minutes if you want to speed that up.
Mixing colors
What colors would you like your soap to be? You have red, yellow and blue colorant. You can mix them to get shades of purple, green and orange.
- + = purpleRed plus blue makes purple
- + = orangeRed plus yellow makes orange
- + = greenBlue plus yellow makes green
To get an accurate idea of how the colors will look, wait to mix them until you have added your milk paste to the soap base, then add the colors drop by drop and stir them in. The milk makes every color soft and creamy, like the ones above. A little red makes pink. Add more drops for a deeper color.
A little goes a long way.
If something looks wrong
-
The base hardened before I finished mixing
-
Your room is cool. Remelt it. Stand the cup back in hot water, or microwave it in ten to fifteen second bursts, stirring between each one. Milk and color already stirred in will melt right along with it, and nothing is lost. Remelting as often as you need to does no harm.
-
The colorant will not come out of the bottle
-
The glycerin is cold and thick. Stand the bottles in a mug of warm water for ten minutes. If you are in a hurry, take the dropper top off and lift the color out with a stir stick.
-
White lumps in the soap
-
The milk paste was not smooth, or the powder went in dry. It is harmless. Mash longer next time.
-
Foam on top of the bars
-
The mixture was stirred too fast. Spritz it with alcohol while it is still liquid, or scrape the foamy part off.
-
Soft, sticky bars
-
Either the mixture got too hot, or water got into it. Let the mixture cool before you add the milk and colors, and make sure the bowl you mash the milk paste in is completely dry.
-
The soap does not smell like much
-
If your kit came with fragrance, the base was probably too hot when the fragrance went in. Let it cool a little longer next time.
-
A bar will not come out of the mold
-
Put the tray in the freezer for fifteen minutes, then press again from underneath.
-
Color on the washcloth or on your hands when you use the soap
-
It is harmless and it will rinse out. Use fewer drops next time.
Techniques to try next time
Confetti
Melt a small batch of soap base, enough to fill one of the six molds about halfway. Do not add goat milk powder. Mix in one bright color, pour it into the mold, and let it set. Once it is firm, turn it out and shave it into flakes with a vegetable peeler or butter knife.
Melt the rest of the base, stir in the milk paste, and let it cool until it is thick enough to hold the shavings. Stir the shavings in and pour into the molds. Using half a mold for confetti means you will get five bars this time instead of six.
If the shavings sink to the bottom, the base was still too warm. Let it cool a little longer next time. A cool room does this work for you.
A soap within a soap
You will need a small mold. Candy molds, ice cube trays and soap molds all work. Look for a shape about an inch across and not too deep.
Make a small batch of soap in a bright color without milk, as you did with confetti. Pour it into the small molds, let it set, and turn the shapes out.
Put one of the small soaps face down in the bottom of the mold. Dab a little melted soap base underneath it and let it grab for a few seconds. This will keep it from floating up when you pour in the base for the main bar. Spritz the shape with alcohol.
Let your melted base cool before you pour, so it does not melt the small soap already in the mold. Pour slowly against the side of the mold, not straight down onto the shape.
If the edges of the shape look blurry, the soap was too hot. If there is a crack or gap around the shape, or it comes loose later, the soap was too cool.
Keeping your soap
Soap made this way pulls moisture out of the air. If you leave the bars out in a humid room, you might see small beads of water on them. Keeping them in the clear bags until you are ready to use them prevents this.
Your bars will last longer if they dry out between uses. Set them on a soap dish that drains if you have one. Keep them out of the direct spray of the shower.
Use your soap within a year. It is made with real milk, and milk does not keep forever.